VoiceThread Faculty Guide
What is VoiceThread?
VoiceThread is a collaborative online tool that integrates visual media, text, video, and voice into a presentation. You can pre-record your narration of images, documents, videos, and power point slides into one thread for students. You can enable video, audio, or text comments for asynchronous discussion with your class.
Using VoiceThread
-
Log into your course and click on the VoiceThread link.

-
Voice Thread will open within the Moodle course page. You can either work inside Moodle (which is an embedded screen and works a little slowly), or open in a full-size tab. If you choose to open as a full size tab, you will be able to see the administration block on the left which will allow you to edit the settings on the VoiceThread.
-
You may be asked to login to VoiceThread. If so, please use your Brandeis email address.
-
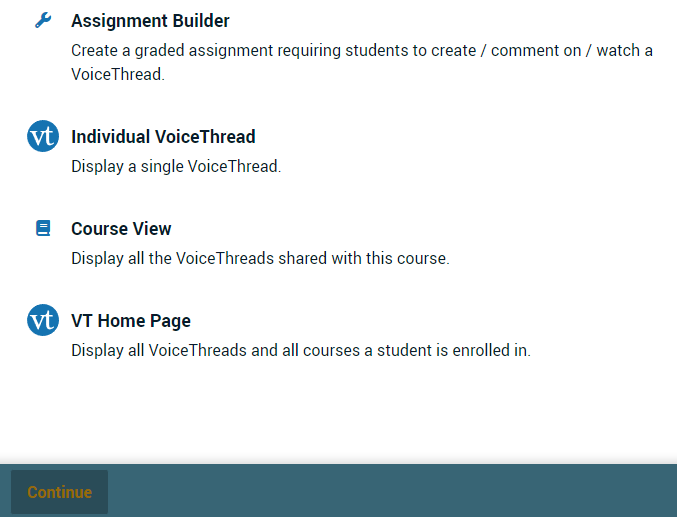
Select the type of VoiceThread you are interested in using via the Setup tool and click Continue. For this exercise, we will be clicking on Individual VoiceThread and creating our first voice thread from there.
-
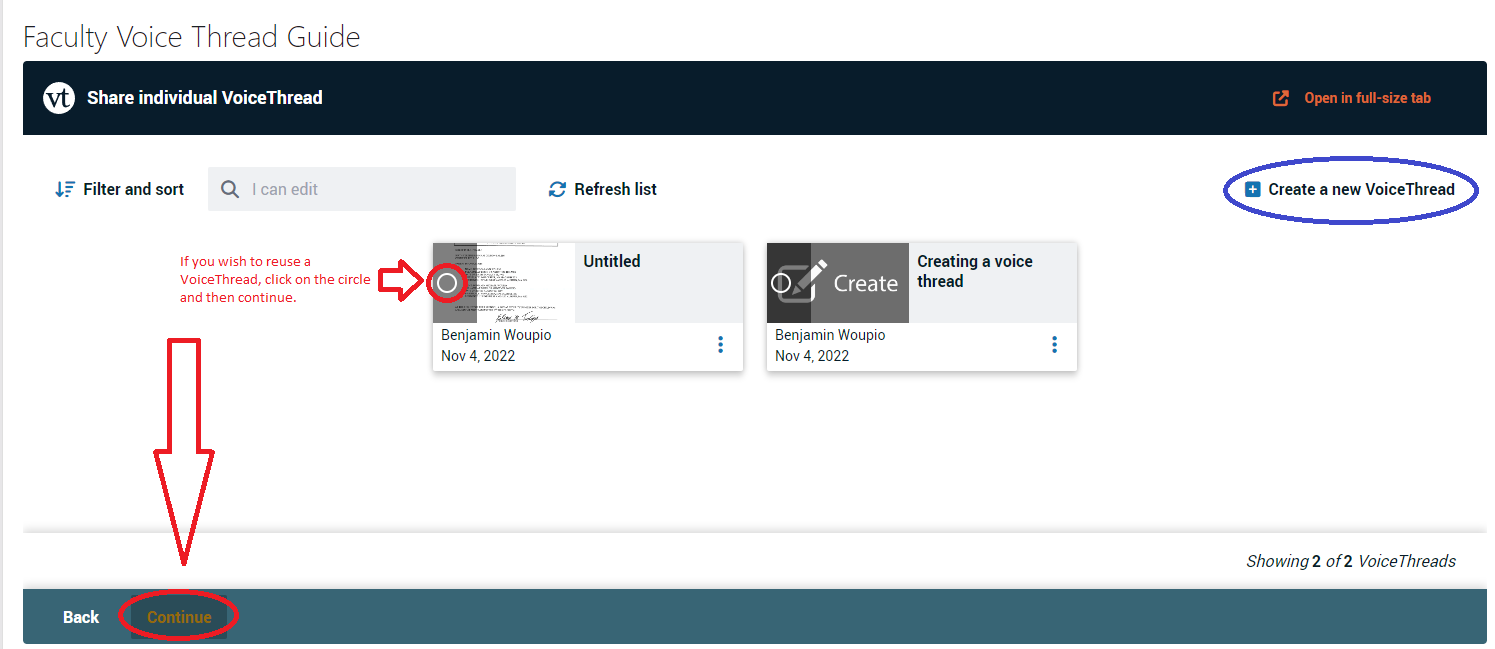
After you click on Individual VoiceThread you will see either a list of all your individual voice threads (if you have any) or it will be completely blank. If you would like to use one of your previous VoiceThreads, simply click on the circle on the VoiceThread you would like to use and click Continue. If you would like to create a new voice thread, select + Create a new VoiceThread on the top right corner of the box.
-
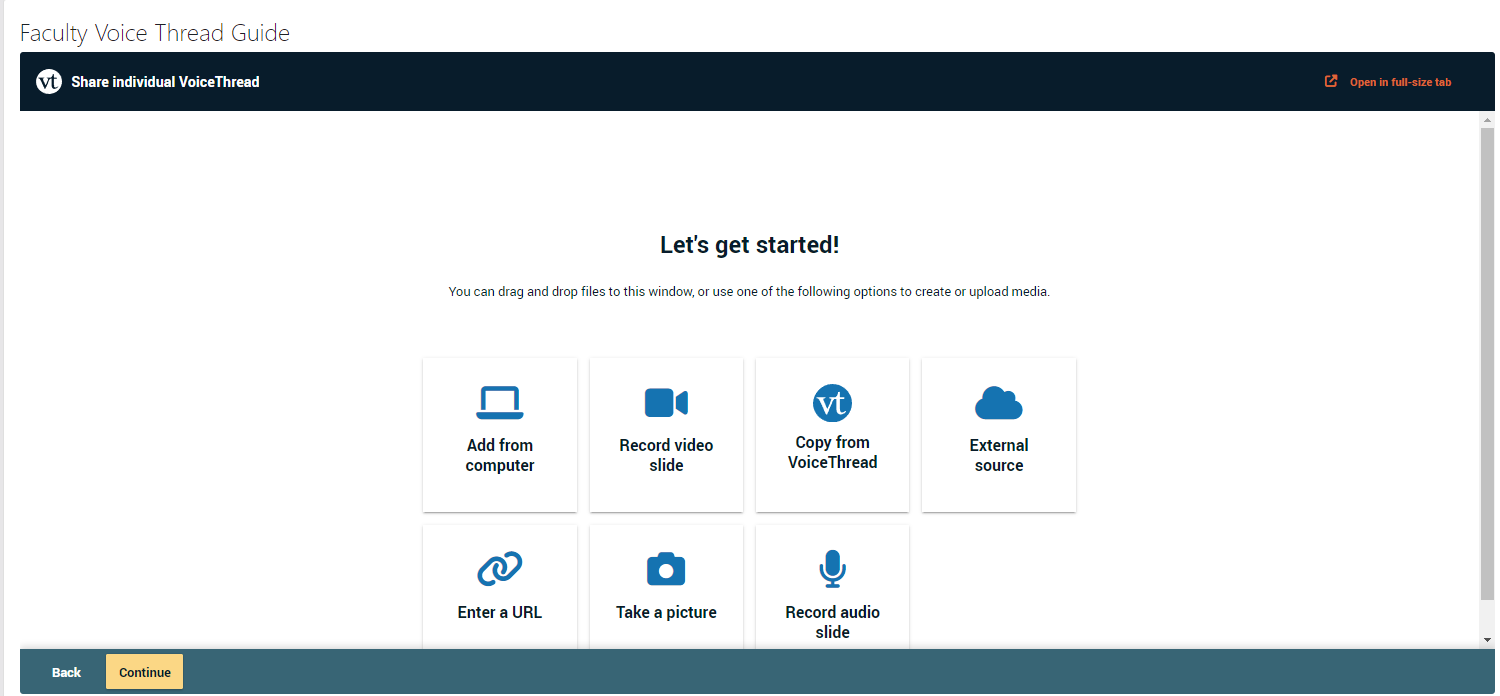
From here, you can drag and drop files to this window or use one of the following options to create or upload media. For this example, I am going to select Add from Computer and create a VoiceThread about my favorite food.
-
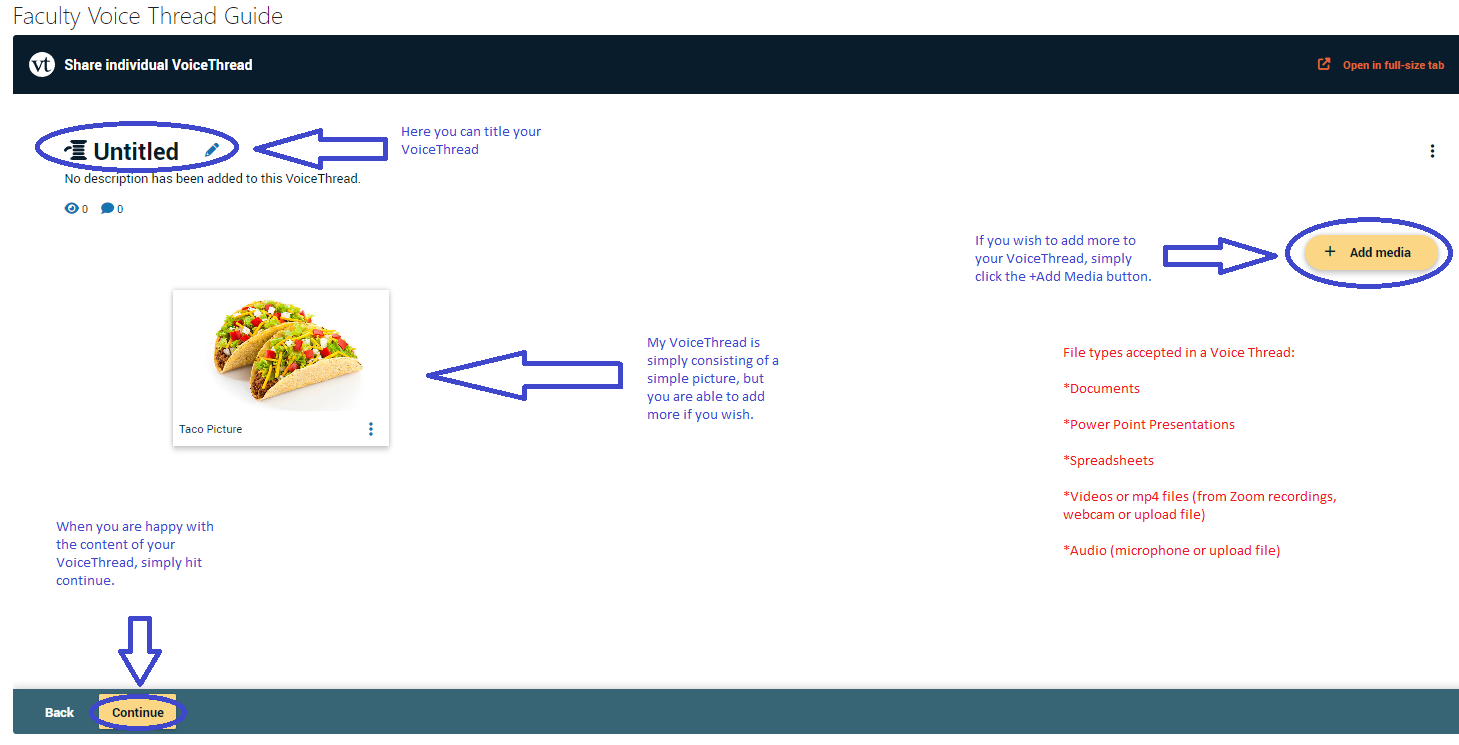
Once you choose the content you want for your VoiceThread, you will be brought to the page below. Here you will be able to add a title to your VoiceThread, add more content to your VoiceThread by clicking on the + Add Media button, or simply click Continue when you are ready to move on to the next step. Note: You can add up to 50 pieces of media to a VoiceThread.
-
Now you should see your VoiceThread on the screen. From here, if you would not like to add any comments, you can simply click on the Continue button at the bottom left of the screen. However, for this example, we will be adding a comment. To add a comment, click the + button at the bottom middle of your VoiceThread.
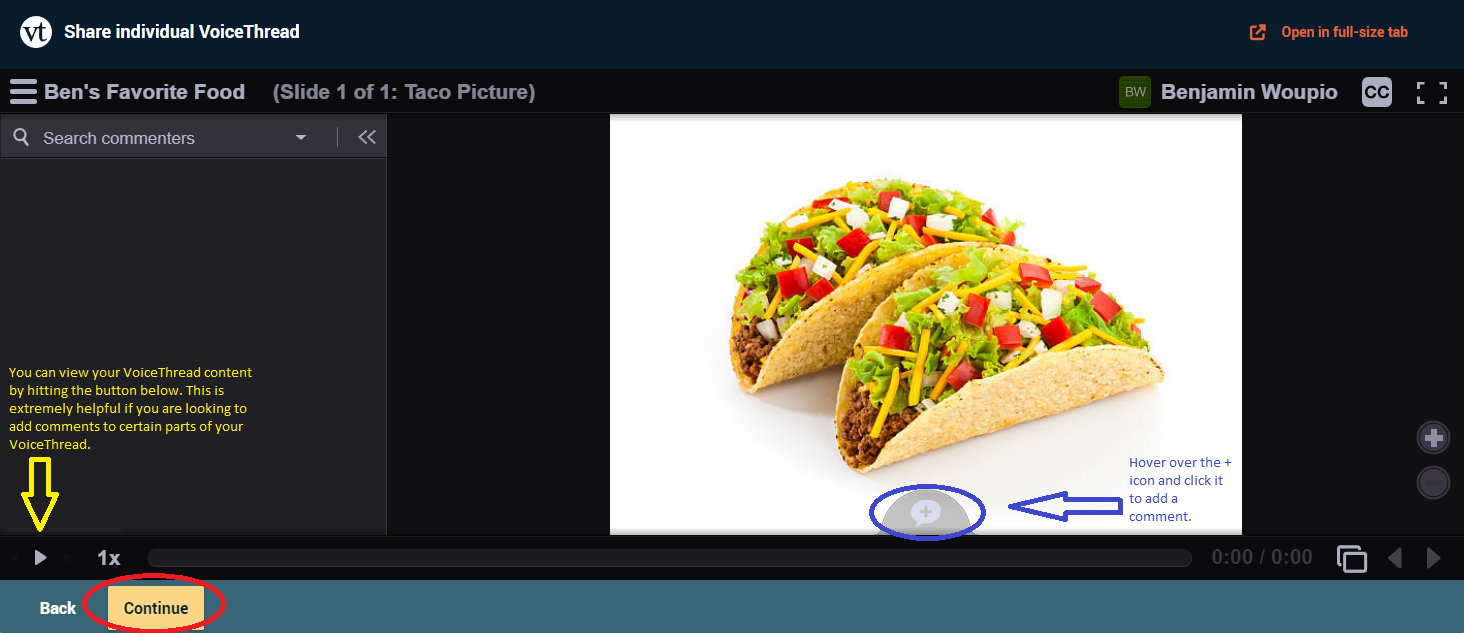
-
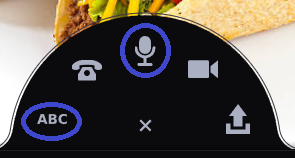
Once you select the button, you will see the following choices:
a. ABC: Text
b. Phone: Call into VT and leave a voicemail recording
c. Microphone: Voice recording through your device
d. Video: Video recording through your device
e. Arrow: Upload a recording you have created previously
-
For this example, I am going to add two comments, one via text using ABC and the other will be a voice recording via the Microphone button.
a. ABC: You will see a text box appear where you can enter text. Once you are done, click Save.
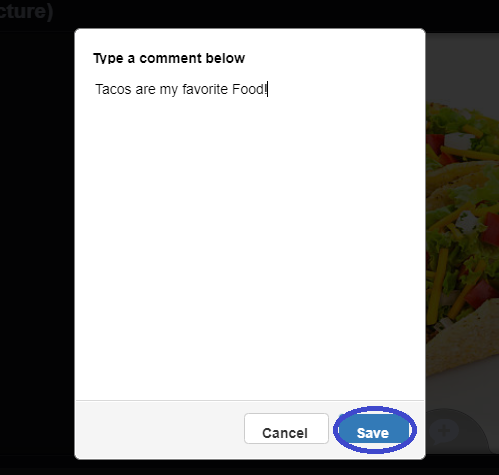
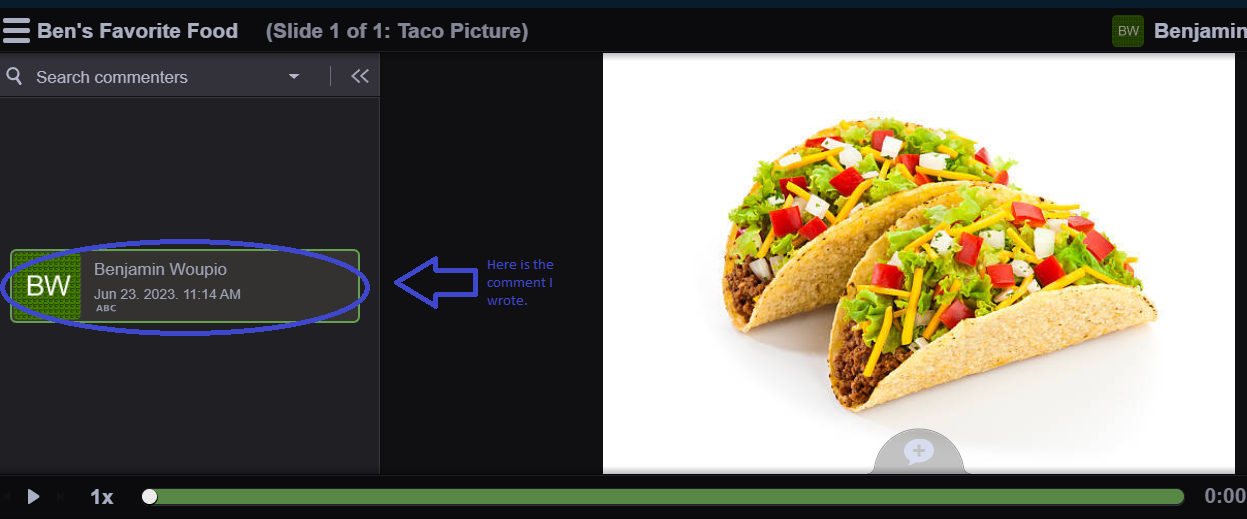
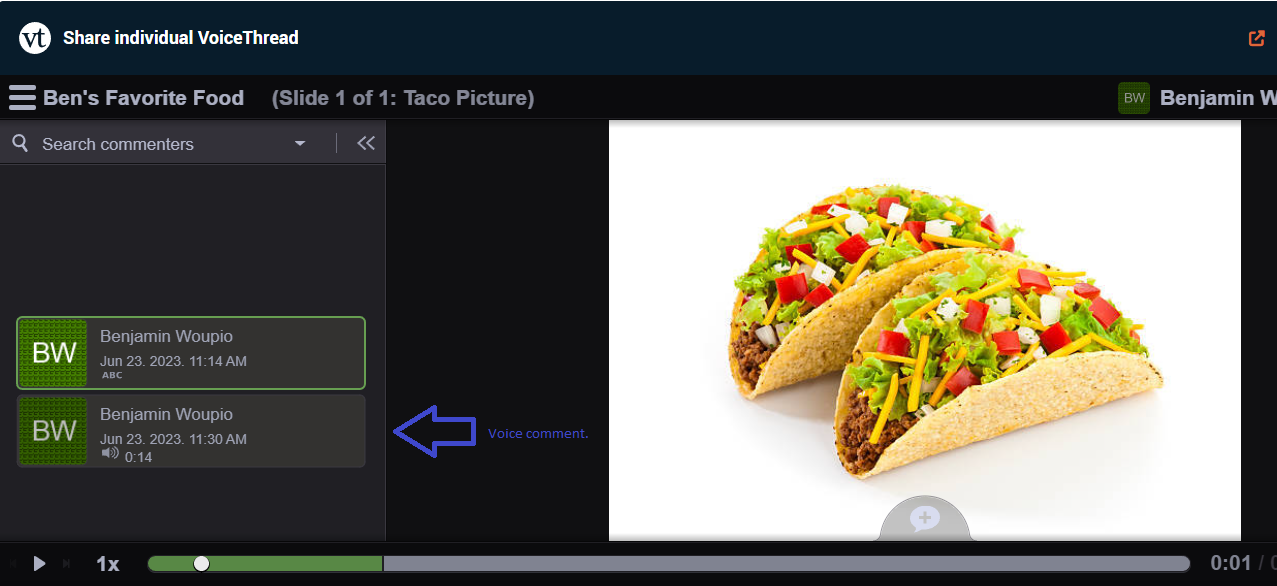
Your comment will then appear on the left hand side of your VoiceThread.
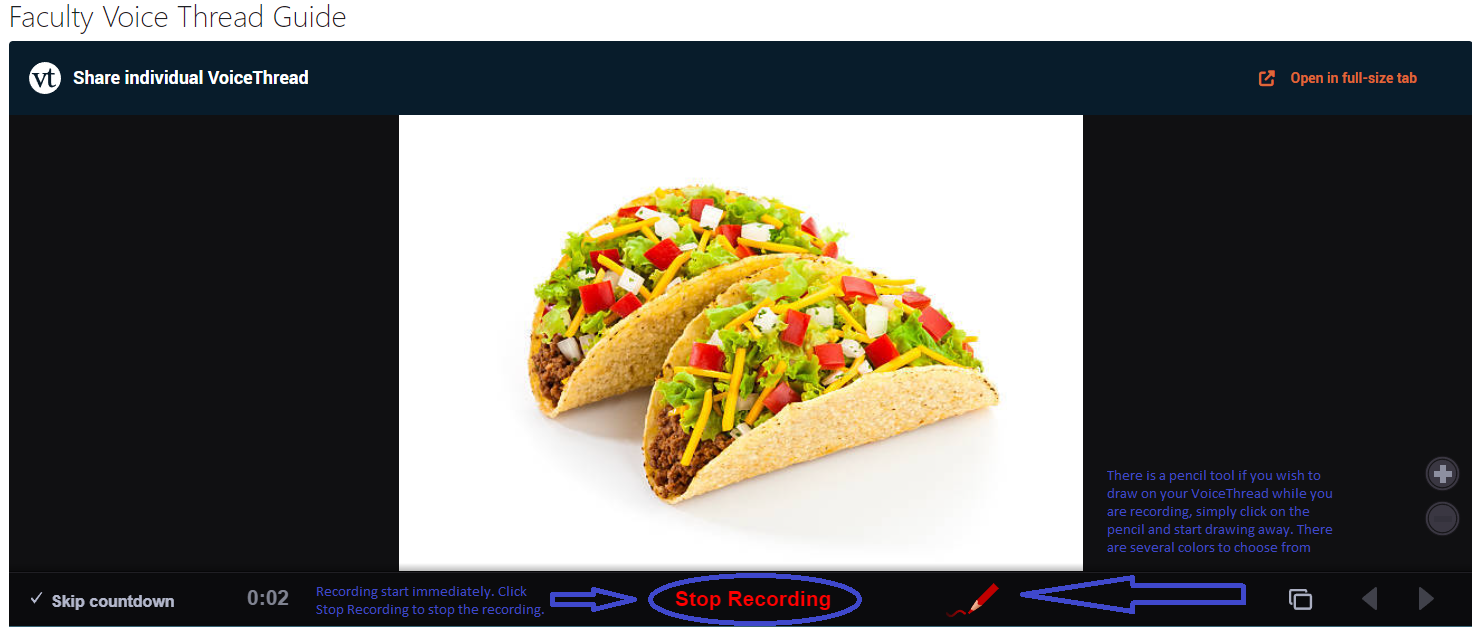
b. Microphone: You will immediately be recorded once you press the microphone. Once you are satisfied with your recording, click stop recording. If you wish to draw on the image as you record, click on the colored pencil and then click on your VoiceThread to draw.
Once you stop recording, you will be brought to a new screen where you have the option to play your comment, record more audio, cancel it or save your work.
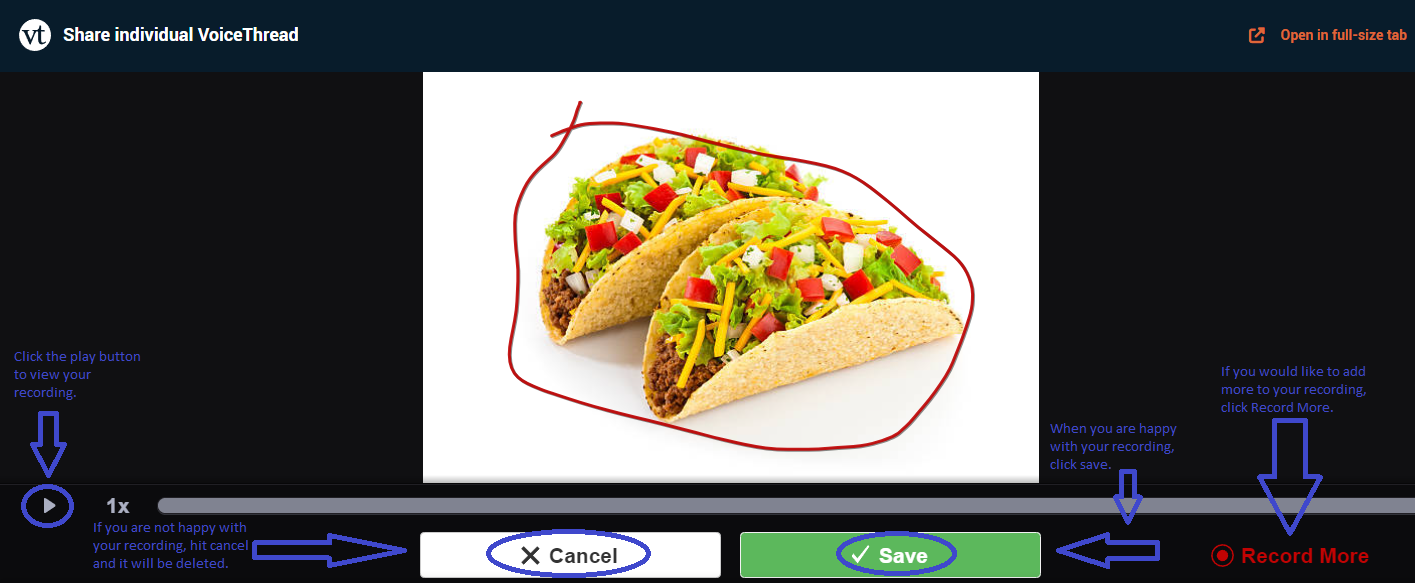
Once saved, your comment will appear on the left hand side of the screen, similar to the ABC comment I added earlier. Keep in mind that all comments will be time stamped and if you click on an individual comment, it will bring you directly to where the comment was left in the VoiceThread.
-
When you are happy with your VoiceThread, click Continue.
-
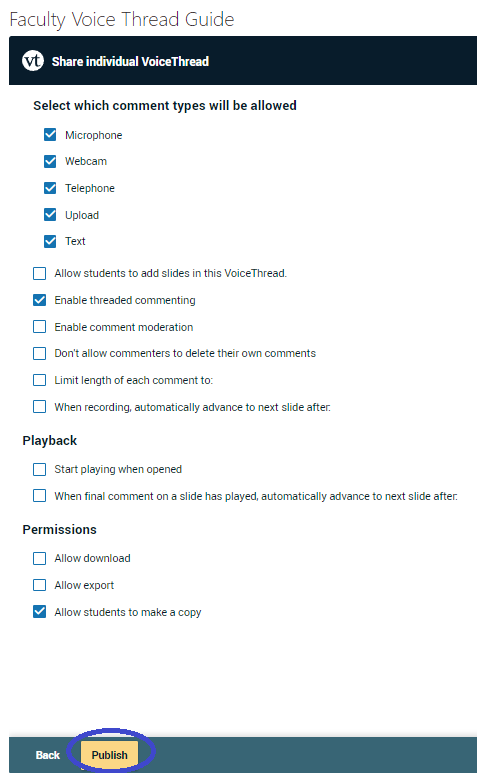
On the next page, you can select and unselect a number of settings, such as playback settings and permissions. Once you are happy with your settings, click Publish.
-
You will then be routed back to your class home screen and your VoiceThread will be saved where your originally added it.